How to get rid of those stubborn rings inside shirt collars

One of our Laundry Revolutionaries wanted to know how to get rid of those stubborn rings which form inside shirt collars. So, we thought we should share our tips!

For all of these tips, an old toothbrush will really help you out – if you’ve got one that’s been sitting around for a while that you might be happy to replace, they’re very handy for really getting your home-made stain removers deep into the fabric!
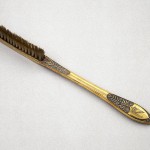
Ok, not that old

OK, not that old

There are a good few ways to get rid of these pesky stains, but it does depend whether your shirts are white (ooh, classy) or coloured (stylin’!).

For white shirts, make your own stain remover by mixing 1 part white vinegar with 1 part water. Let your shirt sit in the solution for a few hours or overnight, then pop in the washing machine as normal.


When life gives you lemons, make home-made stain remover!

When life gives you lemons, make home-made stain remover!

If you don’t have any white vinegar, try direcly applying lemon juice, which can rival heavy duty cleaners for cleaning power. Or, if you need a quicker fix, get a little of your dish washing detergent and mix it with water to make a paste. Apply that to the stained area and let it sit for half an hour or so before laundering in the machine.

(Gross tip – the rings around the collar are formed by the natural oils from your neck, so as well as dish washing detergent, you can use any cleaning agent labelled as a “degreaser”.)

CAREFUL THOUGH! The above methods can all bleach dyed clothing, and for your colours, you’ll need something a bit more gentle.

Don't forget to take the shampoo out of the shower first...

Don’t forget to take the shampoo out of the shower first…

Firstly, try a bit of shampoo – it is designed to remove body oils, after all! Doesn’t matter what kind you use, so this is your chance to get rid of the awful bubblegum shampoo you accidentally bought, or that caustic hotel stuff that slipped into your washbag. Use an old toothbrush to rub a little shampoo directly into the stain, let it sit for 15-30 minutes, then wash as normal.

Alternatively, if you have some lanolin-based handwash, apply some to the stains on your shirt (fine with whites or colours), let it sit for 15 minutes, then wash. This method might take a couple of goes!

Of course, if none of these work, or if you just don’t have the time, send your shirts in to LaundryRepublic and our experienced team will be happy to take care of those nasty stains for you!

Flickr images credit: Napoleon’s toothbrush, c 1795 by Science Museum London; Lemons by Penelope Waits; Tears in rain by FailedImitator

Give your clothes a fresh starch!

Starching shirts and blouses helps them to last longer and gives them a nice, crisp finish. At LR, we apply a light starch to shirts as standard, but did you know that you can quickly and easily recreate this yourself by making your own spray starch at home?

Dissolve one tablespoon of cornstarch into a pint of cold water, stirring until it develops a milky colour. Put the solution into a clean spray bottle and label it clearly. Then shake well and spray onto your clothes before you iron them. You could even add a couple of drops of your favourite essential oil to lightly fragrance your shirts at the same time!

Make your own shirt folder!

At LaundryRepublic, our customers can set preferences for how they would like their dry cleaning and laundry to be done. For example, some customers prefer their shirts to be returned folded because they travel for business. They come packed like brand new shirts, ready to wear after a long journey.

Here’s a little industry secret: you can produce your own perfectly-folded shirts every time by making your own shirt folder using nothing more than some cardboard and tape.

Our friends at Instructables have produced a simple walk-through guide, here: http://www.instructables.com/id/Shirt-Folder/

And of course if you’d prefer us to fold your shirts for you, you can set your account preferences here: https://www.laundryrepublic.com/preferences.html, or by clicking on the ‘My preferences’ option in the menu in the top right of your screen when logged in to your LR account

How to remove underarm stains from clothing

underarm stainsHope you had a lovely Christmas time! After a bit of a rush since our break, we’re back! Thanks to a query from overseas I have prepared our first stain removal tip of 2013: underarm stains.

Underarm stains are one of the toughest stains to remove because the salts and acids from sweat combine with chemicals in the deodorant and actually change the structure of the fabric. For future reference, deodorants that don’t contain aluminium should help to prevent this from occurring, as this compound is what causes the yellow marks.

To remove sweat stains we would usually recommend the use of solutions made of baking soda and white vinegar, but you might want to try other cleaning agents such as household ammonia, which is alkaline and will help to break up the minerals. Create a solution of equal parts ammonia and water and dab it on the stain (do this in a well-ventilated area). Let it sit for an hour and wash at a cool temperature. You could even try meat tenderizer – its natural enzymes are really good at removing tough biological stains (also blood and urine), but don’t use it on natural fabrics like wool or silk. Dampen the stained area with water and apply half teaspoon of meat tenderizer using your fingers. Let it work for an hour, then wash at a cool temperature. If the shirts are coloured, test these methods first on an unseen area to prevent fading.

For white shirts, you could also try aspirin: crush and dissolve two aspirin pills into 100 ml of warm water and soak the stained area in the solution for 2 – 4 hours, then wash thoroughly. Do not use chlorine bleach, as it reacts with the protein in sweat and will actually darken the stain. Letting the garments air dry will help to bleach natural fibres like cotton and linen; but be aware that sunlight may damage polyesters.

Image source: http://bit.ly/152st7s

Why do women’s shirts & blouses cost more than men’s shirts?

Customers sometimes ask why women’s shirts and blouses are priced differently to men’s shirts. The simple reason is that blouses are significantly more difficult and time-consuming to press. Shirt pressing equipment has been designed to fit a standard men’s shirt – made of cotton and broadly the same shape.

However, women’s shirts are typically smaller and more fitted, designed to hang on a female body. Women’s shirts are often made using other materials, such as rayon, and feature accessories, such as sequins or lace, which mayrequire more attention. For this reason, women’s shirts have to be pressed entirely by hand, taking more time and effort and resulting in a moreexpensive process.

We would prefer to charge a standard price across both men’s and women’s shirts – it would be easier for us to administer, and easier for our customers to understand. At the moment, the machinery and processes aren’t quite there to allow us to do this, but we are working on it!